The aim of this project is to experience various cloud technologies and combine these technologies with cyber security.
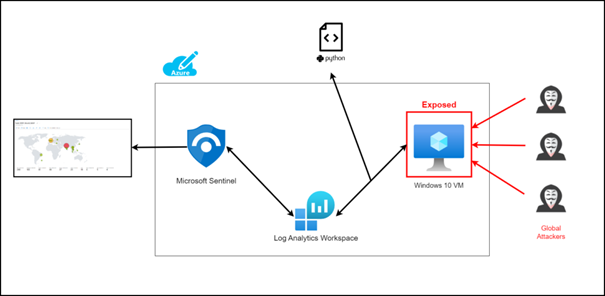
The system works as follows. We are creating a vulnerable virtual machine on Azure, this machine will be our honeypot. Thanks to the python script I wrote, we collect the logs of the attacks (only RDP) on this virtual machine and transfer them to “Log Analytics Workspace” in Azure as a custom log. Then we connect the log Analytic Workspace to a cloud-based SIEM product called Microsoft Sentinel. If we did everything right, we can see real-time attacks on the map thanks to Microsoft Sentinel and python script.
Setting up the Cloud Environment
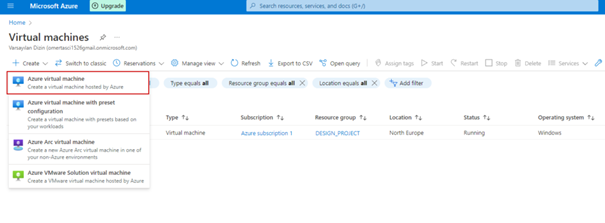
First, let’s set up the virtual machine that is our honeypot. You need to create an Azure account. You can create your Azure account for free here.
Creating Virtual Machine
Then login to the Azure portal and follow the steps.
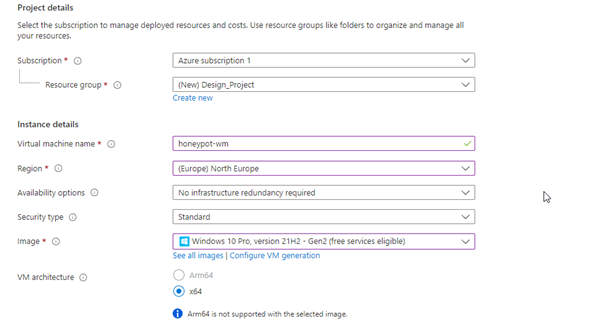
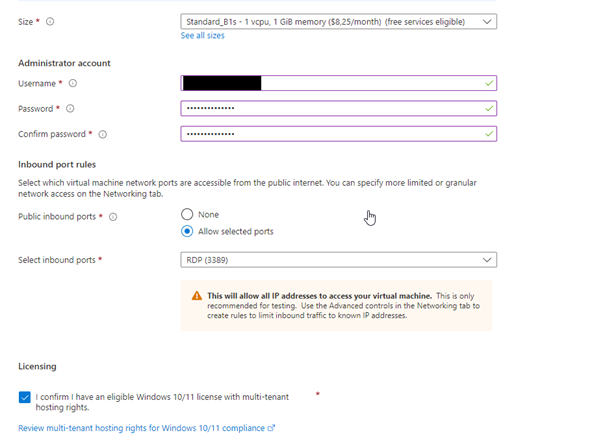
Don’t forget your username and password as we will use this when connecting to remote desktop !!!
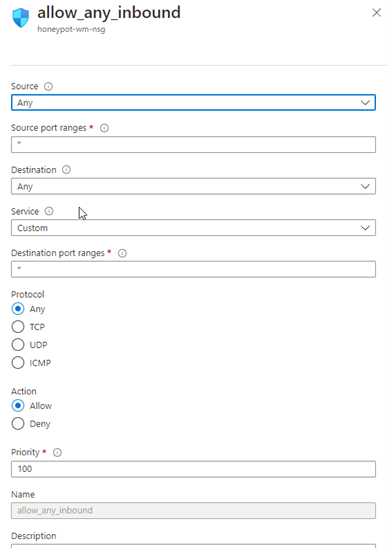
And then hit next and next. On the page that opens, we set the NIC network security group to Advance and we remove the existing security group and create a new one as below.
Creating Log Analytics Workspace
We transfer the created custom logs to the Azure environment with the log analytics workspace.
We enter the log analytics workspace page and click create, then follow the steps below.
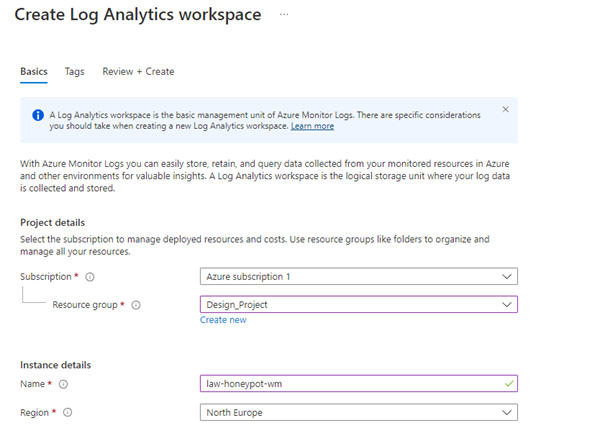
Click review and create and then create. After this process is finished, come to the Microsoft Defender for Cloud. Here click on the Environment Settings section on the left.
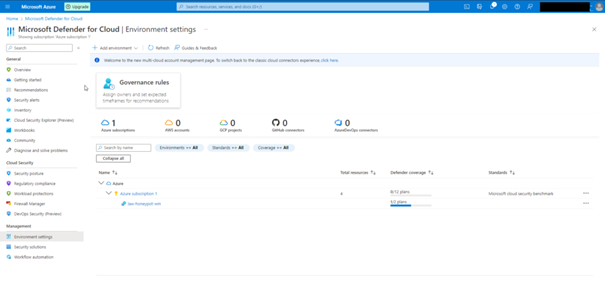
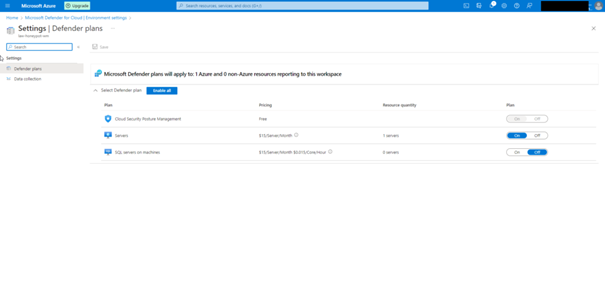
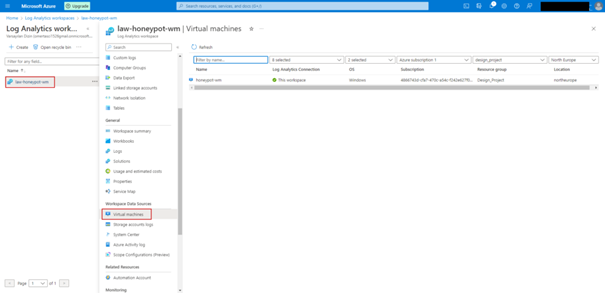
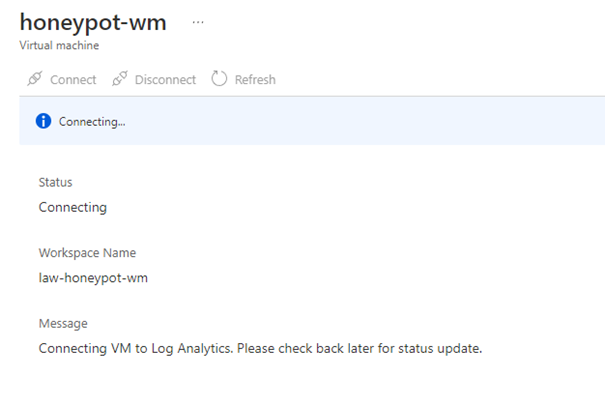
As the next step we need to connect our virtual machine with law.
Setting up Microsoft Sentinel
This step is pretty simple. We connect Microsoft Sentinel with the Log analytics workspace we created. Go to Microsoft Sentinel and select Log analytics workspace and click add.
Connecting Virtual Machine
Connect with the help of RDP using the username and password that we set when creating the virtual machine.
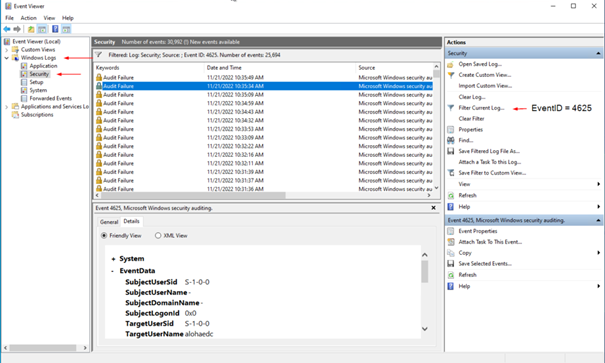
You can see the event viewer of our honetpot above. We filtered the events with the event id 4625 because we only want to see the failed rpd logs.
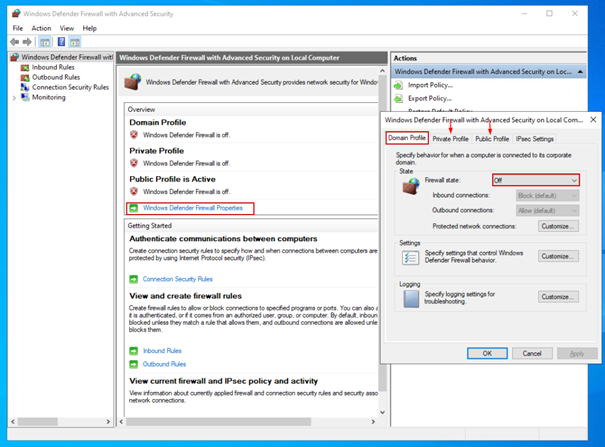
Below we turn off the firewalls to make your honeypot look more vulnerable.
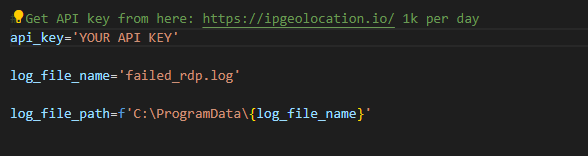
Python Script (custom_log_exporter.py)
The python script we have written works briefly as follows. We get the failed rdp logs (EventID=4625) in the security section under the Event Viewer in the virtual machine with the help of the while loop and then we get geolocation information by sending the IP information obtained from these logs to the 3rd party API (https://ipgeolocation.io/). We write all this information in a log file that we have created in the appropriate log format.
You can download this python script from here.
All you have to do is place your api key in the appropriate space before running the python script.
After downloading the python file from the given github link to the virtual machine, we run it.
It saves the log file created by the script to the “C:\ProgramData\failed_rdp.log” path.
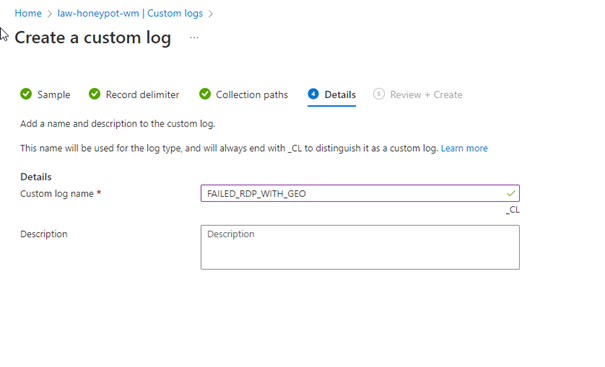
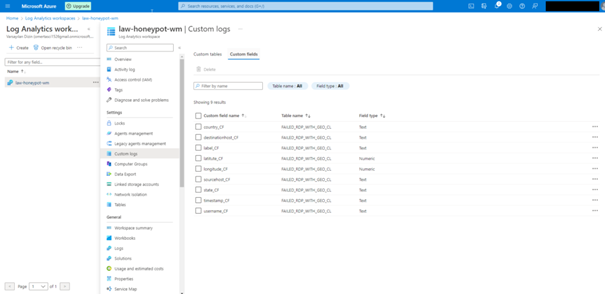
Creating Custom Log on Log Analytics Workspace
We follow the steps below to process the custom logs we have created in the Azure environment.
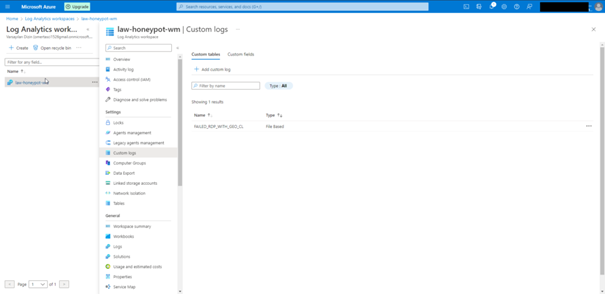
Click Add Custom Log
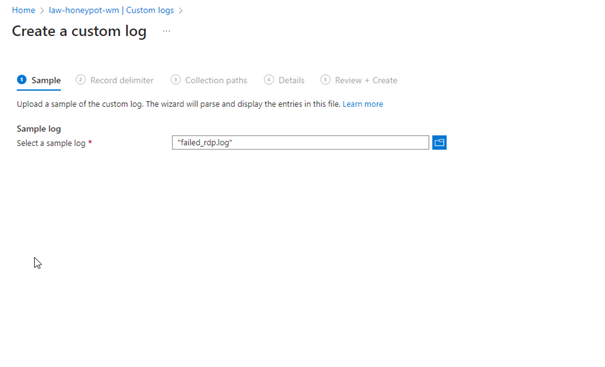
Create a copy of the Custom Log file created in VM on your own computer and show the path here !!


Above, we give the path of the Log file created in VM.
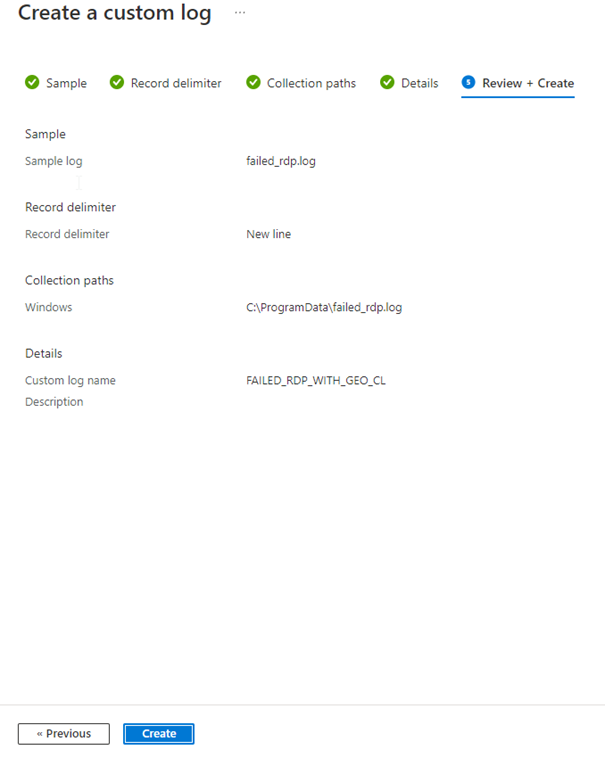
Click Create.
Here we are waiting 5 10 minutes for Custom logs to be retrieved from the VM.
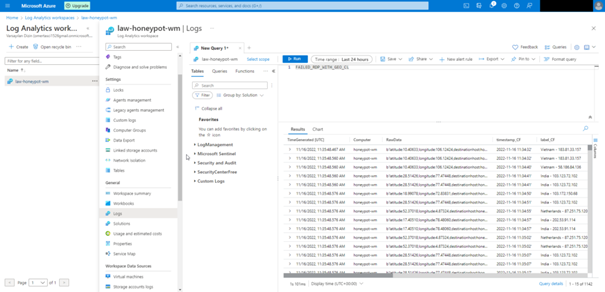
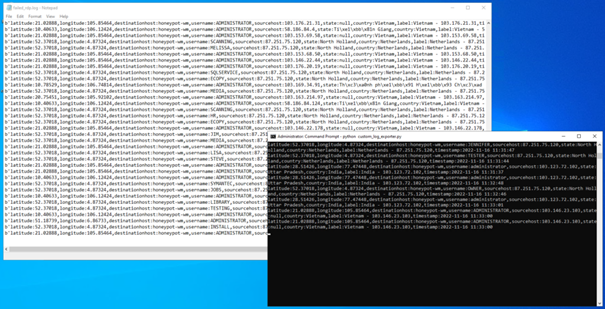
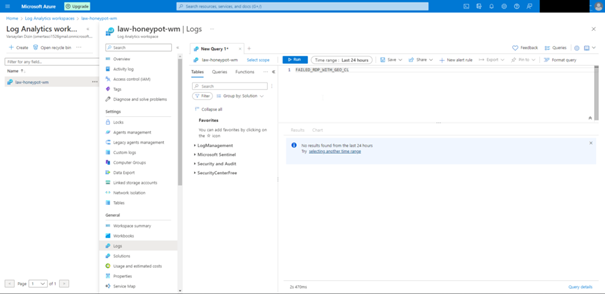
As you can see, our custom logs have started to come in. What stands out here is that all the information is given under raw data, we want each column to be different, and we can do this by following the steps below.
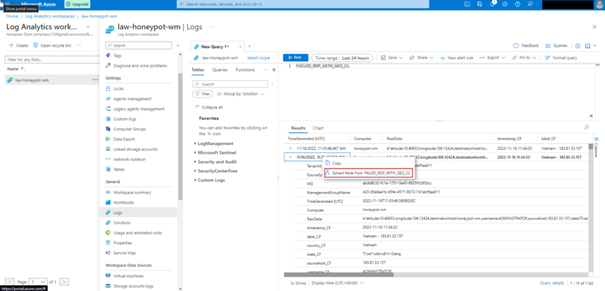
In the window that opens, we highlight and label each value.
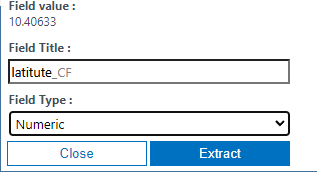
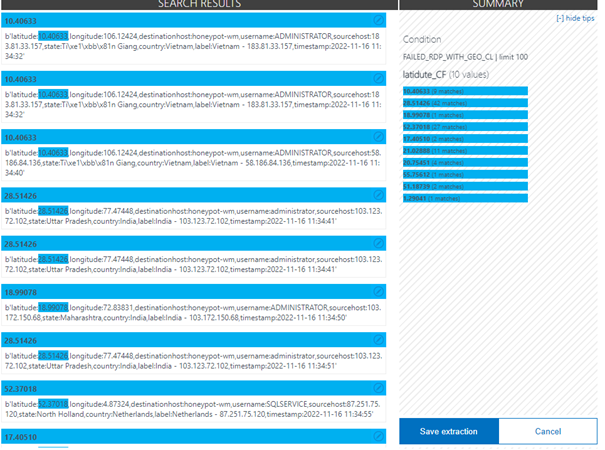
We repeat this for each value. The result should look like this.
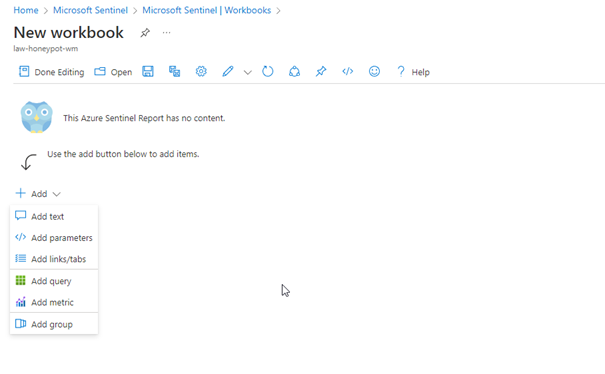
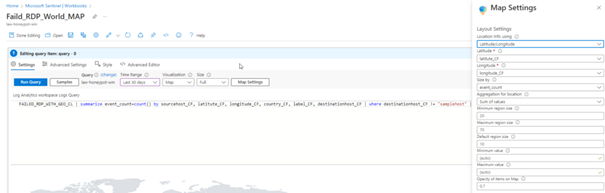
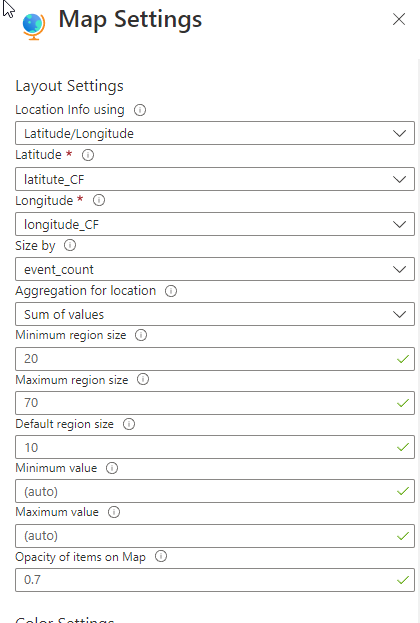
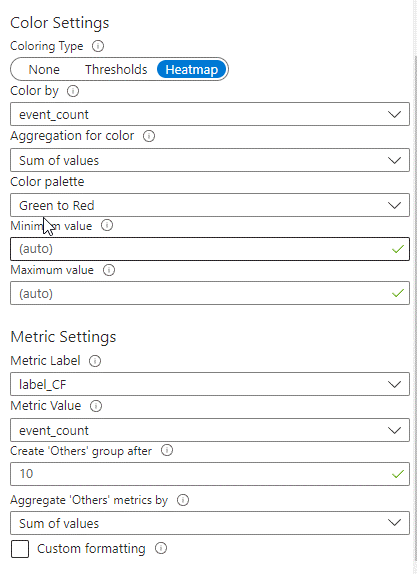
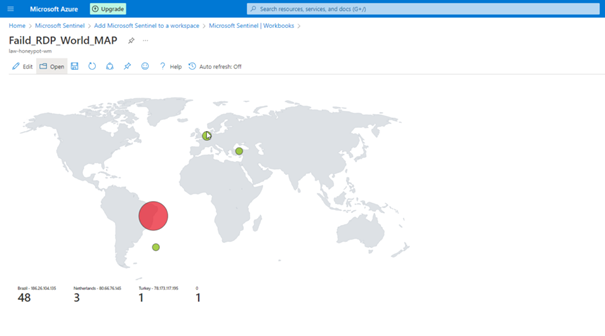
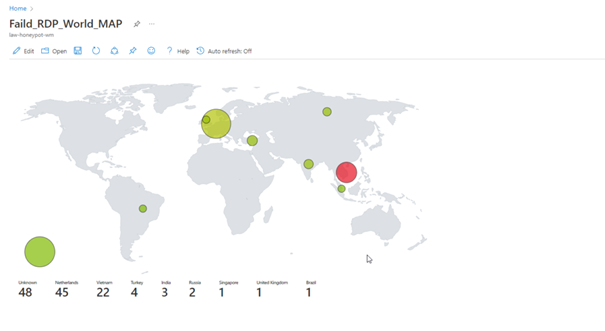
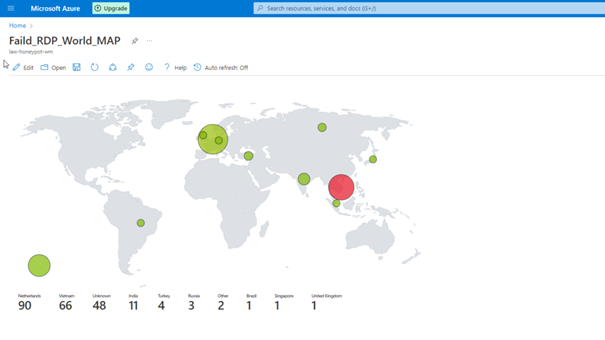
Creating Microsoft Sentinel Attack Map
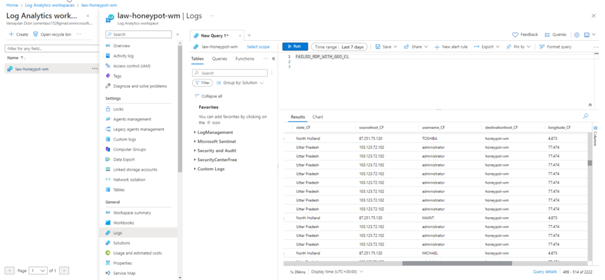
You can view the attacks simultaneously with the map here.
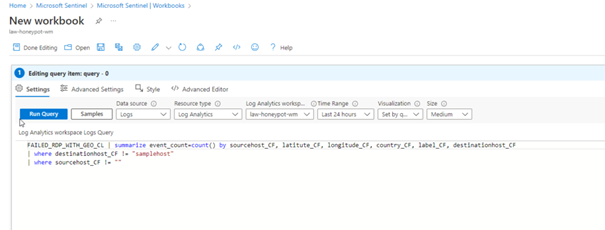
FAILED_RDP_WITH_GEO_CL | summarize event_count=count() by sourcehost_CF, latitude_CF, longitude_CF, country_CF, label_CF, destinationhost_CF
| where destinationhost_CF != "samplehost"
| where sourcehost_CF != ""
Change of the Map in Hours
If we have done everything properly, here we see the final version of our project.
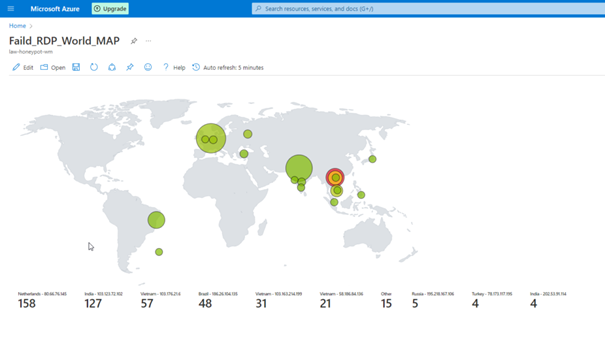
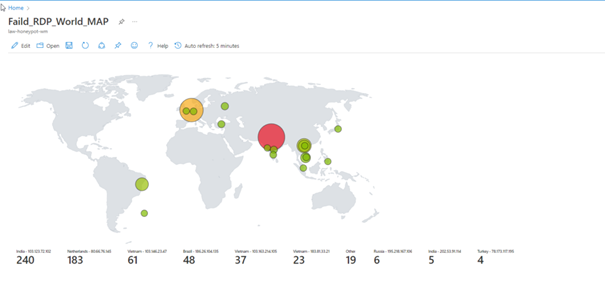
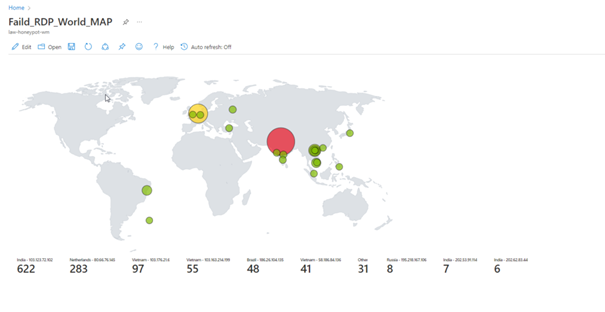
Unfortunately, we cannot leave the program open because we have a limited number of API queries, but as you can see, we can see the attacks live.
Conclusion
Any device that is somehow accessible on the Internet, regardless of who owns it, is attacked by bots, whether it is a large company, a state-owned device, or for personal use.
That’s why you shouldn’t leave such devices vulnerable in the dark corners of the internet.
See you in the next article.